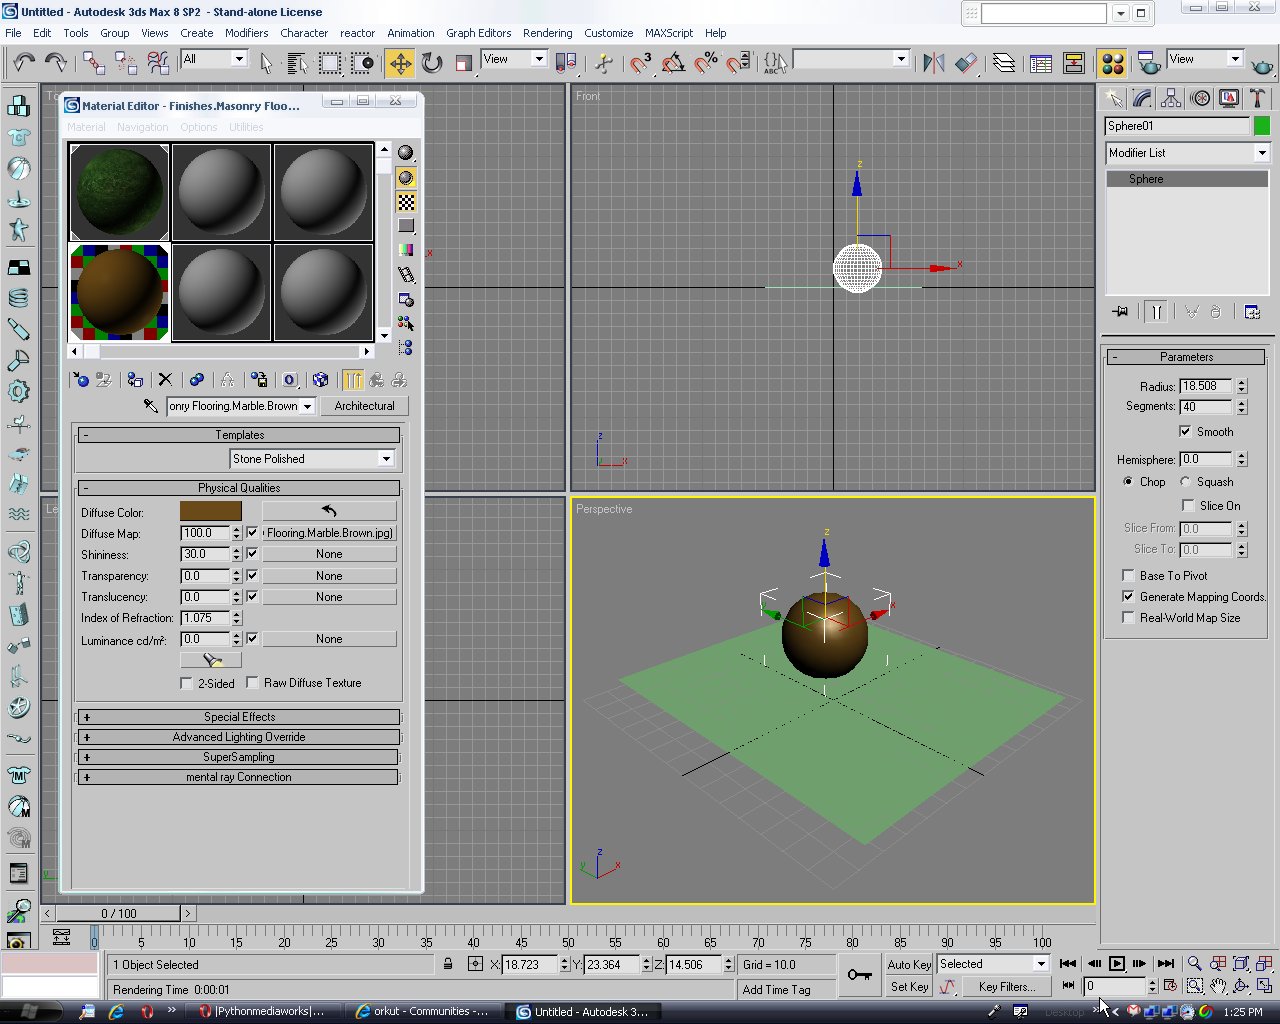
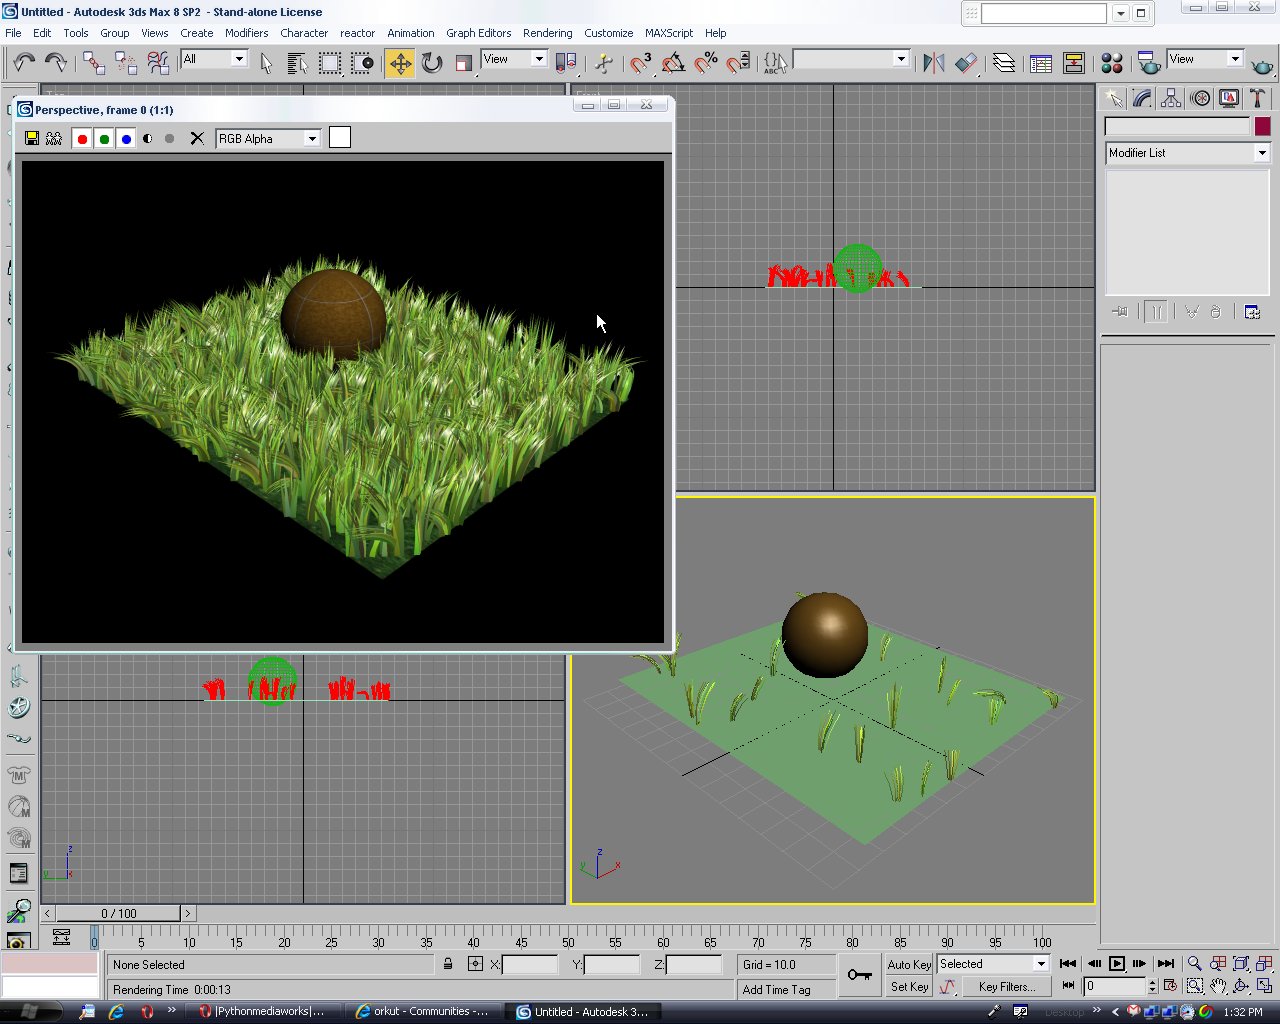
I)Open Autodesk 3DS Max and make the scene as shown in the pic below.
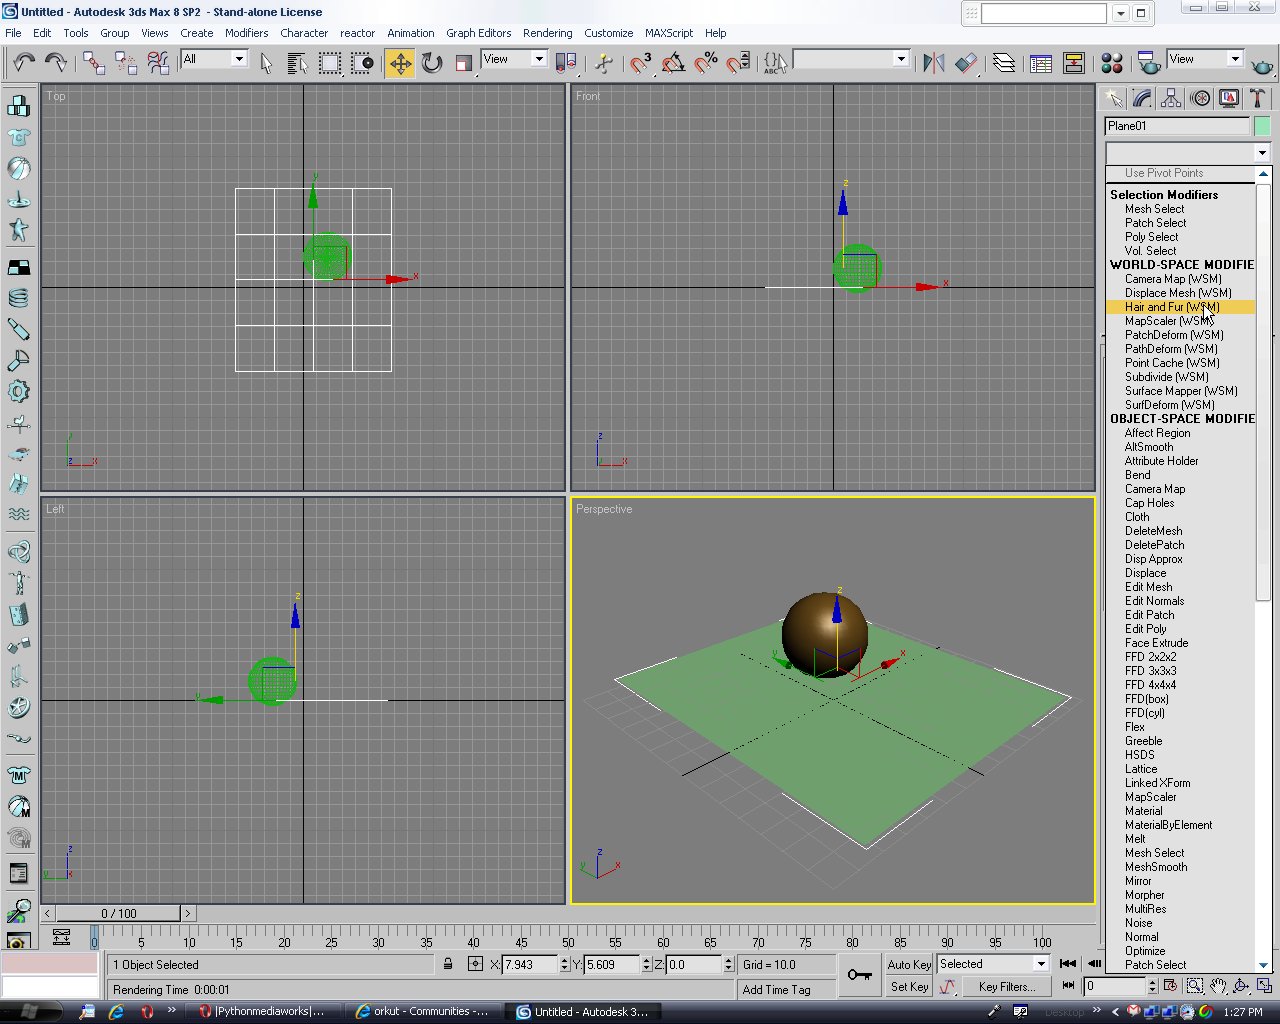
II)Click on the plane and go to the Modifier tab and then select 'Hair and Fur (WSM)' from the Modifier List.
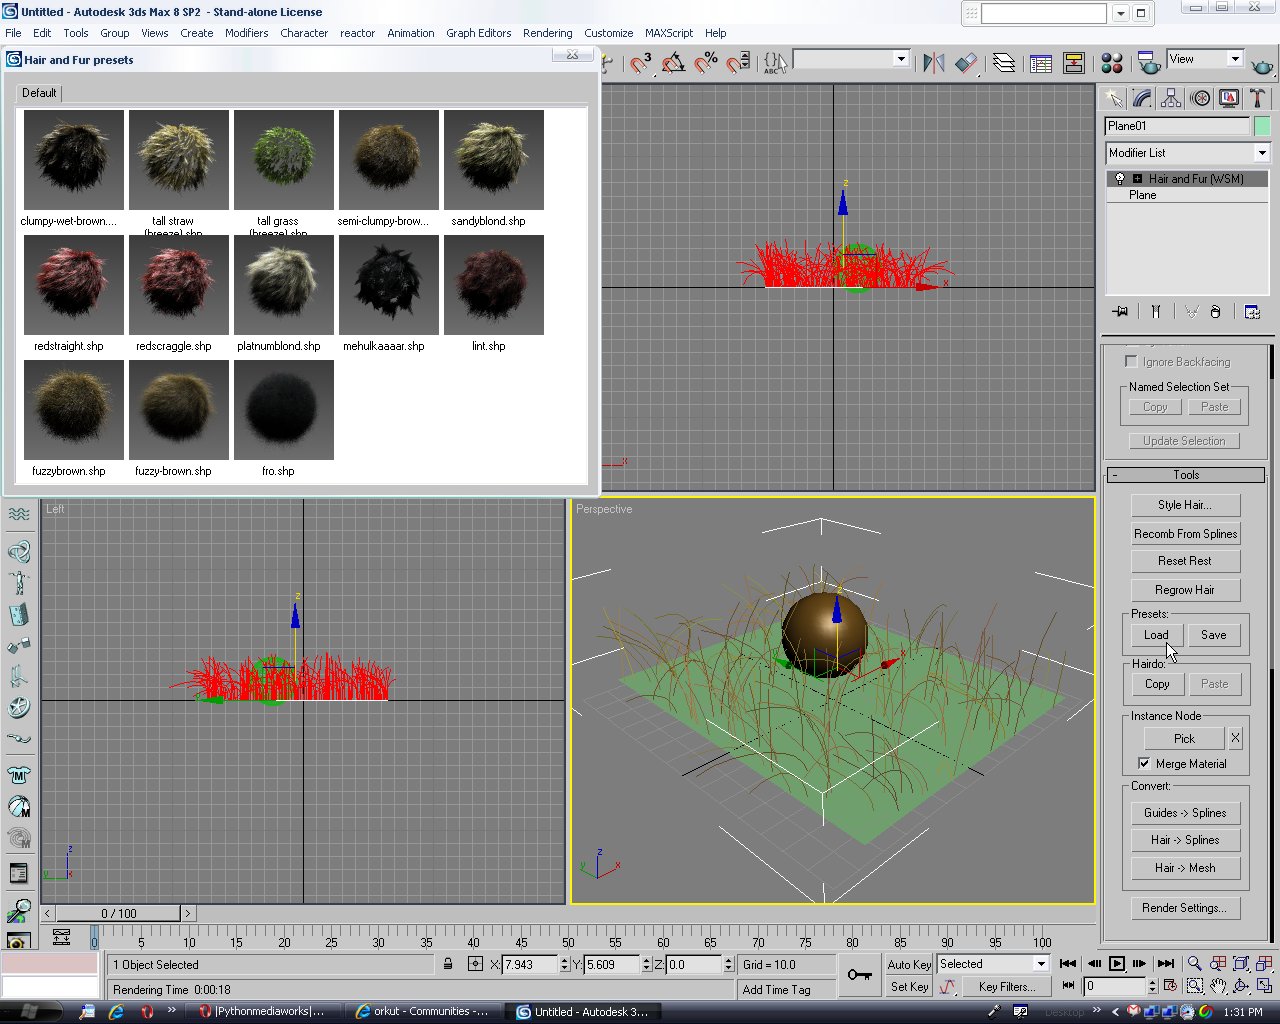
III) In the tools click on the 'Load' from presets and select 'tall gras'. You can select anything you want to.
IV) Click on render (F9).
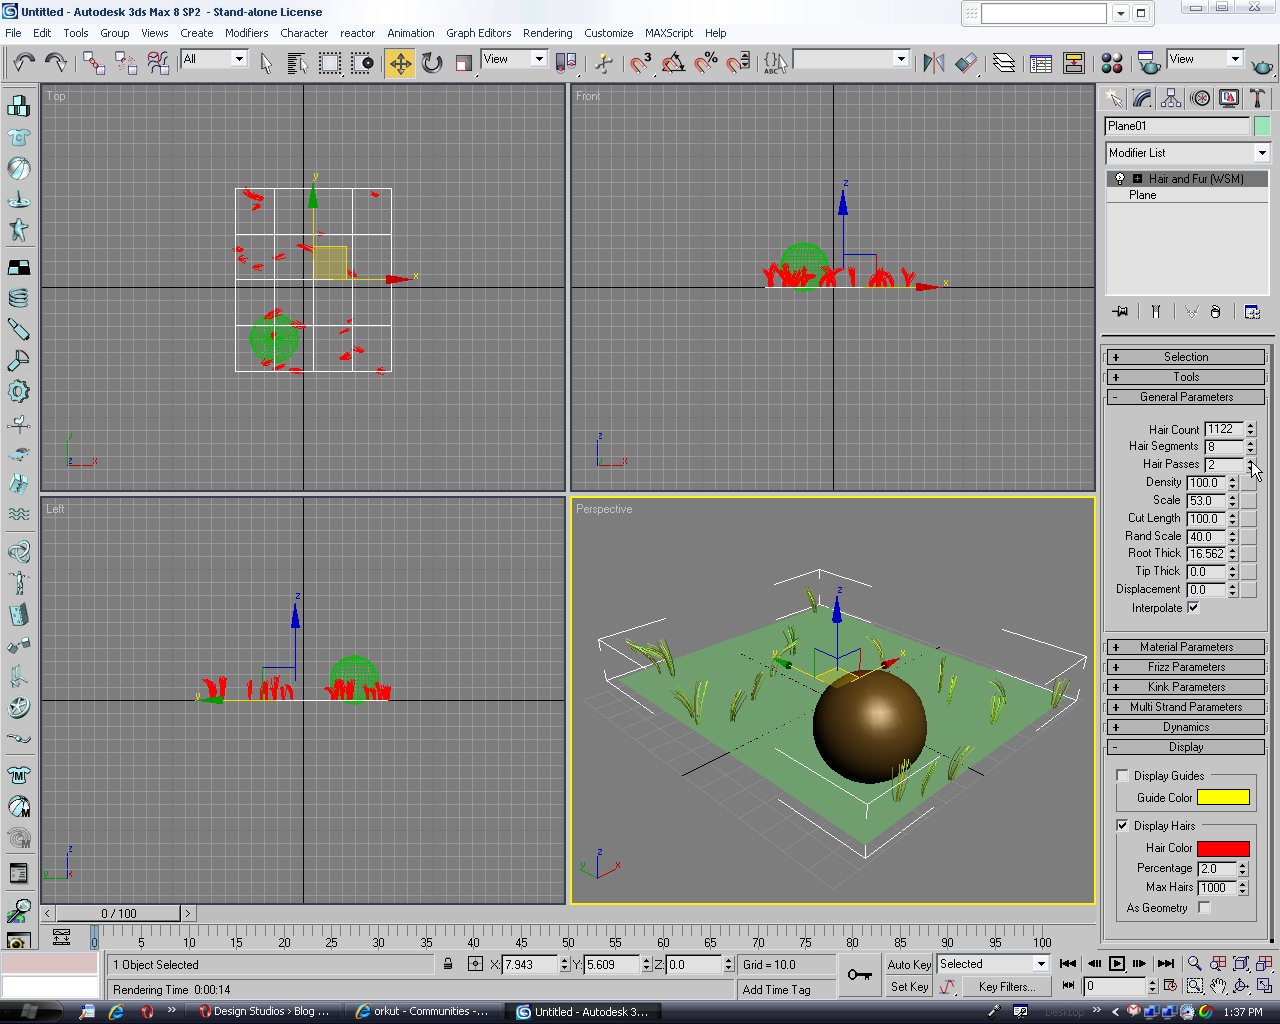
V) Under the Hair and Fur modifier in the 'Dynamics' select 'Live' under mode and 'sphere' and click on Add and select on the 'sphere'.

VI)Increase the hair passes in the General Parameters. It will improve the rendered file but be carefull it will take time.
Hit render (F9)
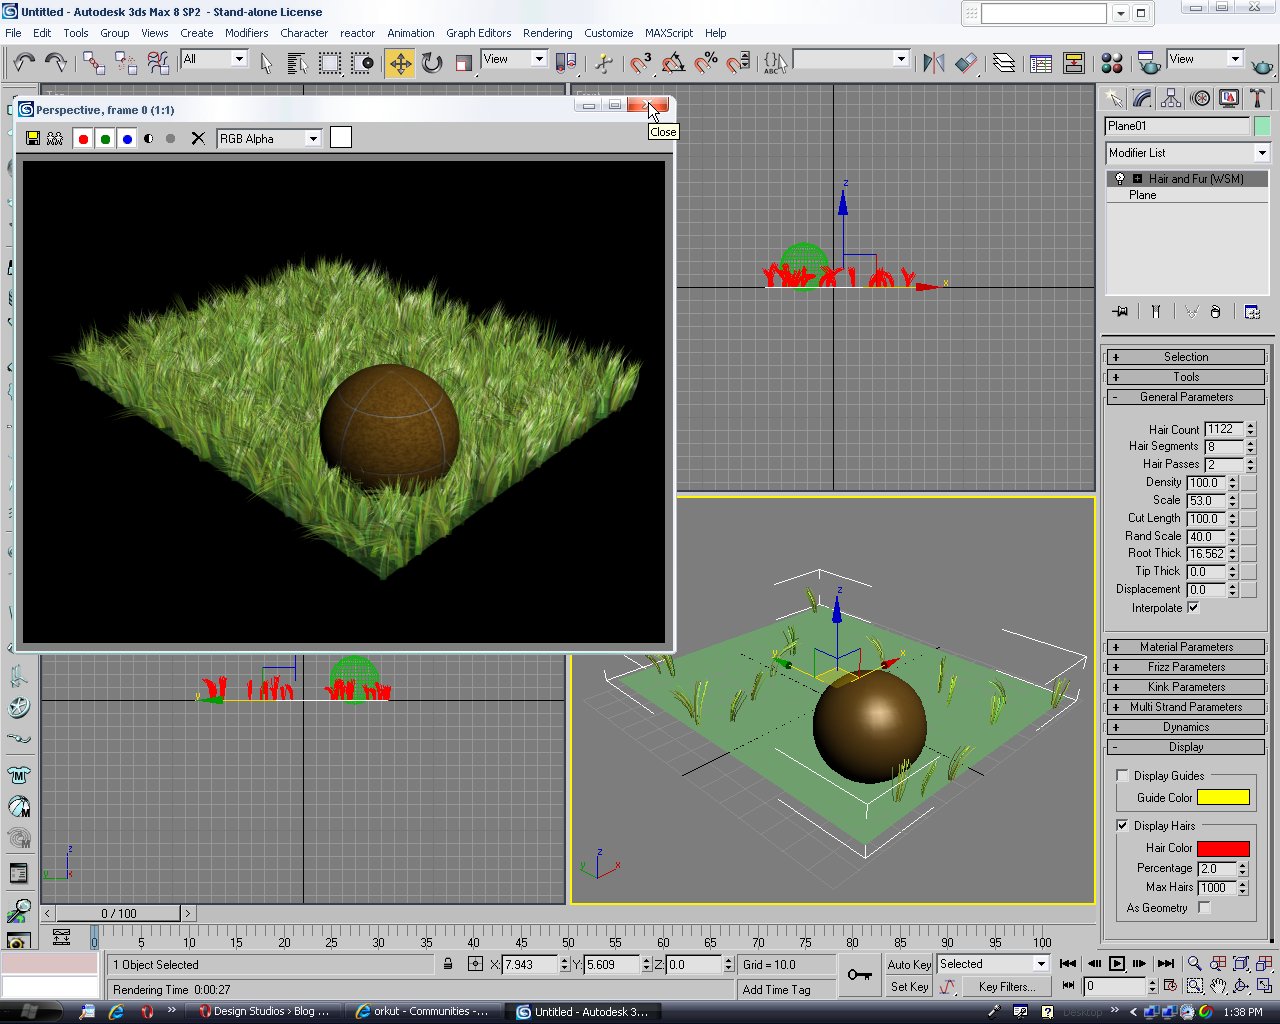
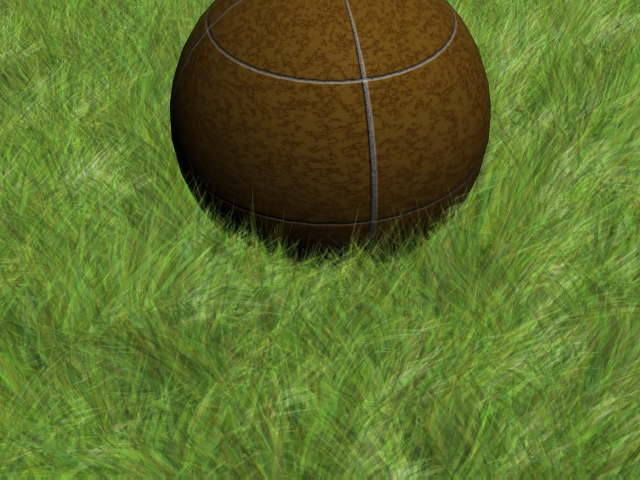
VII)Final image